Thursday, August 31, 2023

OpenCV basics continued...Draw a Line

cv2.line() function is used to draw a line segment between start point and end point.


Create a function draw_line() to wrap the cv2.line() function, and set default values for color, thickness and line_type, when this function is invoked later don’t have to specify these parameters because these default values will be used.

1 def draw_line(image, start, end,

2 color=(255,255,255),

3 thickness=1,

4 line_type=cv2.LINE_AA):

5 cv2.line(image, start, end, color, thickness, line_type)

Call this function to draw a line,

7 # Draw a line

8 draw_line(canvas,

9 start=(100, 100),

10 end=(canvas.shape[1]-100, canvas.shape[0]-100),

11 color=(10, 10, 10),

12 thickness=10)

The result looks like Figure shown below-


Share:

Sunday, August 27, 2023

OpenCV basics continued...Draw Shapes

Now we will use OpenCV functions to draw the following shapes on an empty canvas-

  • Lines
  • Rectangles
  • Circles
  • Ellipses
  • Polylines

Create an Empty Canvas

So far, the images we have used are coming from the image files, now we are going to create an empty canvas from numpy library for drawing.

numpy is a popular Python library for numerical computing that provides a powerful multi-dimensional array object and various functions for performing mathematical operations on the arrays. It provides efficient storage and manipulation of arrays and allows for fast mathematical operations on the entire array without the need for loops. It is one of the fundamental libraries for scientific computing in Python and is widely used in fields such as data science, image processing, machine learning, and engineering.

As we know an image is made of pixels in rows and columns and channels, in another word 3-dimensional array. Therefore, numpy is good for supporting this type of operation.

Now import numpy in the beginning of the code.

1 import cv2

2 import numpy as np

Then create a canvas with size of 480 in width and 380 in height, a canvas is an empty image. Remember a color image has three channels representing BGR color space, so the array we are going to create using numpy should have three dimensions – 380, 480, and 3. The datatype of the array is uint8, it contains 8-bit values ranging from 0 to 255.

3 canvas = np.zeros((380, 480, 3), np.uint8)

4

5 cv2.imshow("Canvas", canvas)

6 cv2.waitKey(0)

7 cv2.destroyAllWindows()

So Line 3, np.zeros() create an array that has 380 rows, 480 columns, and 3 channels corresponding to blue, green and red. np.zeros() will fill the array with all 0, as we explained earlier all 0 means a black color.

Execute the above code, the result is a window with the black canvas with the size of 480 x 380.

Now we want to paint the canvas with some color. See line 4 in the below codes, it will set values of (235, 235, 235) to the array, which means to set a color to the canvas image, this color code is blue = 235, green = 235 and red = 235, it represents light gray.

4 canvas[:] = 235,235,235

The canvas is painted in light gray, as Figure below, we will draw shapes on it. If you want to paint it with different color, simply change the values in line 4.


Share:

Thursday, August 24, 2023

OpenCV basics continued...HSV Color Space and Channels

In addition to the BGR color space, an image can also be represented by HSV (Hue, Saturation, Value) color space, also known as HSB (Hue, Saturation, Brightness), which is a cylindrical color space that describes colors based on three attributes: hue, saturation, and value/brightness, as shown in Figure below. The three attributes are also represented in channels. 

In the HSV color space, colors are represented as a point in a cylindrical coordinate system. The hue is represented by the angle on the horizontal axis, the saturation is represented by the radius or distance from the center, and the value/brightness is represented by the vertical axis.

The HSV is often used in graphics software for color selection and manipulation because it allows users to easily adjust the hue, saturation, and value/brightness of color separately. For example, changing the hue will change the color family, while changing the saturation or brightness will alter the intensity or lightness/darkness of the color.


Hue represents the color portion of the image, which is described as an angle on a color wheel ranging from 0 to 359 degrees. Figure below shows the color wheel, different colors are distributed around a circle with red at 0 degree, green at 120 degrees, and blue at 240 degrees. Hue value at different angles represent different colors.

Normally the hue value is from 0 to 359 representing an angle of the circle, however in OpenCV the values of hue are different, since the values are stored in an 8-bit datatype with the range of [0, 255], which can not store the entire hue value of [0, 359]. OpenCV is using a trick to resolve it, the hue value is divided by 2 and stored in the 8-bit datatype. Therefore, the hue in OpenCV is [0, 179].


The below table shows the Hue value at different angles and the corresponding color name and code:


Saturation represents the intensity or purity of the color, the value is defined from 0 to 100 percent, where 0 is gray and 100 percent is the pure color. As the saturation increases the color appears to be purer, a highly saturated image is more vivid and colorful. As the saturation decreases the color appears to be faded out, a less saturated image appears towards a grayscale one.

In OpenCV, however, its value range is extended to [0, 255] instead of [0, 100]. Value/Brightness represents the overall brightness of the color, the value is defined from 0 to 100 percent, where 0 is black and 100 is the brightest level of the color.

Similar to saturation, in OpenCV the range for Value/Brightness is [0, 255], instead of [0, 100]. Same as BGR channels, the HSV is also separated into three channels as well, each in grayscale. Figure below illustrates how the Hue, Saturation and Value/Brightness channels can compose a color image.


In summary, the HSV color space is a cylindrical color model that describes colors based on their hue, saturation, and value/brightness. It’s widely used in various applications that involve color selection, manipulation, and analysis.

Share:

Sunday, August 20, 2023

OpenCV basics continued...BGR Color Space and Channels

A digital image is represented in different color spaces, the color space refers to a specific way of representing colors in an image. It is a three-dimensional model that describes the range of colors that can be displayed or printed. There are several color spaces used in digital imaging, and each has a different range of colors and is used for specific purposes. Here we will introduce the BGR and HSV color spaces in this post and the next, both are commonly and widely used in image processing. 

BGR stands for Blue, Green, and Red. It is a color space used to represent colors on electronic screens, like computer monitors, TVs, and smartphones. In this space, colors are represented by three primary colors: Red, Green, and Blue. Each primary color has a range of 0 to 255, meaning each color can have 256 possible values, which makes a total of 16.7 million ( = 256 × 256 × 256 ) possible colors.

Each primary color is called a channel, a channel has the same size as the original image. Therefore, an image in BGR color space has three channels, blue, green and red. Figure below shows the idea of how the three channels compose a color image.


A single channel does not have any colors, it’s a grayscale image. Because the three primary colors can build up a color, a single channel only has one value, which can only represent a grayscale, not a color.

Therefore, the above Figure explains the concept, but not quite correct, because the blue, green and red channels are all in grayscale without colors. The above red channel is shown in red, looks like it is red, but that is not the case, it should be in grayscale. Similarly, the green and blue channels should be also in grayscale.

Figure shown below is the correct one, the blue, green and red channels are all in grayscale, they are mixed together to produce the color image.

Each channel is represented by an 8-bit value ranging from 0 to 255, the combination of the three primary colors at their maximum intensity (255, 255, 255) results in white, while (0, 0, 0) results in black, anything in between results in different colors. The same value in three channels, such as (125, 125, 125), represents a gray color.


Share:

Friday, August 18, 2023

OpenCV basics continued...Image Fundamentals

Pixels

Pixels (short for "picture elements") are the smallest units of a digital image. Each pixel represents a tiny point of color that, when combined with other pixels, forms the complete image.

Pixels are typically arranged in a grid within a rectangle or square, with each pixel having a specific location within the image. The color of each pixel is represented by a combination of numerical values that represent the intensity of the three primary colors of blue, green, and red (BGR).

The resolution refers to the number of pixels in the image, usually expressed in terms of the width and height of the image in pixels. The higher the resolution, the more detail the image can contain, as there are more pixels available to represent the image. However, higher resolution images also require more storage space and processing power.

Typically, a digital image is made of thousands or millions of pixels, which are organized in rows and columns. For example, for an image of 640 x 480, there are a total of 307,200 pixels, and they are located in 480 rows and 640 columns. The coordinates of a pixel specify the location of the pixel, say a pixel with coordinates of (100, 100) means it is in column number of 100 and row number of 100.

Unlike a mathematics coordinate system, the digital image’s coordinate of the origin (0,0) is located at the top left corner of the image. x-axis represents the columns and y-axis represents the rows.

As a color image shown in Figure below, x-axis is the horizontal arrow at the top facing right, and y-axis is the vertical arrow at the very left and facing down. A pixel can be identified by a pair of integers specifying a x value (in column number) and a y value (in row number). In below Figure, the pixel at (100, 100) is identified and highlighted.


For a 24-bit image, each pixel has 24 bits, it is made of blue, green and red values, each has 8 bits, which value is from 0 to 255. For example, the pixel at (100, 100) in above Figure has blue value of 151, green of 82 and red of 234. The color of this pixel, shown as pink, is determined by these three values.


Share:

Monday, August 14, 2023

OpenCV basics continued...Display Webcam

Like displaying videos, a similar technique is used to display webcam. Replace the above Line 6 with cap = cv2.VideoCapture(0), it will load the laptop/desktop’s default webcam and display it.

In the previous post the parameter of cv2.VideoCapture() function was the path of the video file, now pass the index of the webcam device as parameter, here 0 is used as the default webcam, it will connect to the default webcam.

Some video properties can also be set here, as below-

1 import cv2

2

3

cap = cv2.VideoCapture(0)

# read from default webcam

4

5 # Set video properties

6

cap.set(cv2.CAP_PROP_FRAME_WIDTH, 640)

# set width

7

cap.set(cv2.CAP_PROP_FRAME_HEIGHT, 480)

# set height

8

cap.set(cv2.CAP_PROP_BRIGHTNESS, 180)

# set brightness

9

cap.set(cv2.CAP_PROP_CONTRAST, 50)

# set contrast

10

11 success, img = cap.read()

12 while success:

13 cv2.imshow("Webcam", img)

14

15 # Press ESC key to break the loop

16 if cv2.waitKey(10) & 0xFF == 27:

17 break

18 success, img = cap.read()

19

20 cap.release()

21 cv2.destroyWindow("Webcam")

Line 3 Load video from default Webcam.

Line 6 Set width of the camera video.

Line 7 Set height of the camera video.

Line 8 Set brightness of the camera video.

Line 9 Set contrast of the camera video.

For references, this is the list that can be used as parameter for cap.set():

0 CAP_PROP_POS_MSEC Current position of the video file in milliseconds.

1 CAP_PROP_POS_FRAMES 0-based index of the frame to be decoded/captured next.

2 CAP_PROP_POS_AVI_RATIO Relative position of the video file

3 CAP_PROP_FRAME_WIDTH Width of the frames in the video stream.

4 CAP_PROP_FRAME_HEIGHT Height of the frames in the video stream.

5 CAP_PROP_FPS Frame rate.

6 CAP_PROP_FOURCC 4-character code of codec.

7 CAP_PROP_FRAME_COUNT Number of frames in the video file.

8 CAP_PROP_FORMAT Format of the Mat objects returned by retrieve() .

9 CAP_PROP_MODE Backend-specific value indicating the current capture mode.

10 CAP_PROP_BRIGHTNESS Brightness of the image (only for cameras).

11 CAP_PROP_CONTRAST Contrast of the image (only for cameras).

12 CAP_PROP_SATURATION Saturation of the image (only for cameras).

13 CAP_PROP_HUE Hue of the image (only for cameras).

14 CAP_PROP_GAIN Gain of the image (only for cameras).

15 CAP_PROP_EXPOSURE Exposure (only for cameras).

16 CAP_PROP_CONVERT_RGB Boolean flags indicating whether images should be converted to RGB.

17 CAP_PROP_WHITE_BALANCE Currently unsupported

18 CAP_PROP_RECTIFICATION Rectification flag for stereo cameras (note: only supported by DC1394 v 2.x backend currently)

Make sure a webcam is attached to the laptop/desktop computer and enabled, execute the code you will see a window displaying whatever the webcam captures. Press ESC key to terminate.

Share:

Friday, August 11, 2023

OpenCV basics continued...Load and Display Videos

We were able to load and display an image, now we are going to work with videos, and see how OpenCV can process videos.

Open the ShowVideo.py file in PyCharm. If you are not using the Github project, then create a new Python file, and make sure you have a video file available. There is an mp4 video file called “Sample Videos from Windows.mp4” in the Github project, it will be loaded and displayed in this example. Below is the code-

1 #

2 # Show a video from local file

3 #

4 import cv2

5

6 cap = cv2.VideoCapture("../res/Sample Videos from Windows.mp4")

7

8 success, img = cap.read()

9 while success:

10 cv2.imshow("Video", img)

11 # Press ESC key to break the loop

12 if cv2.waitKey(15) & 0xFF == 27:

13 break

14 success, img = cap.read()

15 cap.release()

16 cv2.destroyWindow("Video")

Line 6 Use cv2.VideoCapture() to load a video stream, the function returns a video capture object.

Line 8 Read the first frame from the video capture object, the frame image is stored in img variable, and the result is stored in success variable indicating True or False.

Line 9-14 Loop frame by frame until all frames in the video object are read, within the loop the image frames are processed one by one throughout the video.

Line 10 Use cv2.imshow() to display a frame. Each frame is an image.

Line 12-13 Wait for 15 milliseconds and accept a keystroke, if ESC key (keycode is 27) is pressed then break the loop. Changing the cv2.waitKey() parameter will change the speed of playing the video.

Line 14 Same as Line 8, load subsequent frames from the video capture object.

Line 15 Release the video capture object to release the memory.

Line 16 Close the Video window

Execute the codes, it will load the video and play it in a window called Video. It will play until either the end of the video or ESC key is pressed.

In Line 12 the cv2.waitKey(15) will wait for 15 milliseconds between each frame, changing the parameter value will change the speed of playing the video. If the parameter value is smaller then the play speed is faster, larger then slower.

Inside the loop from Line 9 to 14 you can process each image before showing it, for example you can convert each image to grayscale and display it, you will play the video in grayscale.

Replace the above Line 10 and 11 with the following two lines, it will convert the image from color to grayscale for every image frame inside the video, as a result, the video will be played in grayscale.

10 gray = cv2.cvtColor(img, cv2.COLOR_BGR2GRAY)

11 cv2.imshow("Video", gray)

Similarly, you can do other image processing inside the loop, for example recognize

the people or faces and highlight them in the video.

Share:

Monday, August 7, 2023

OpenCV basics continued...

Convert Color Image to Grayscale

An alternative way to have a grayscale image is to load the original image first, then use cv2.cvtColor() function to convert it to a grayscale image, this way we will have both original and grayscale images available for further processing. This is useful because in the future when we do the image processing, we want to process the image in grayscale mode while displaying the original color image.

Now replace the code line 2 and 3 in previous post with the following:

1 img = cv2.imread("../res/flower004.jpg")

2 gray = cv2.cvtColor(img, cv2.COLOR_BGR2GRAY)

3 cv2.imshow("Image", img)

4 cv2.imshow("Image Gray", gray)

cv2.cvtColor() is an OpenCV function used to convert an image from one color space to another, here is its syntax:

Syntax - cv2.cvtColor(src, code[, dst[, dstCn]])

Parameters

src: source image to be converted.

code: color space conversion code.

dst: optional, the output image of the same size and depth as src image.

dstCn: optional, the number of channels in the destination image. If the parameter is 0 then the number of the channels is derived automatically from src image.

cv2.COLOR_BGR2HSV/COLOR_HSV2BGR: Convert between BGR color image and HSV space.

cv2.COLOR_BGR2GRAY/COLOR_GRAY2RGB: Convert between BGR color image and grayscale image

Other conversion codes are not listed here, please reference OpenCV documents.

Return Value 

The image that is converted from the source image.

Execute the codes, the color image and grayscale image are displayed side by side, as shown below.


Share:

Friday, August 4, 2023

OpenCV Basics

We'll learn some basic operations supported by OpenCV, such as opening image or video files and displaying them, converting color images to grayscale, or black-white images, connecting to a webcam of a laptop and showing the videos captured by it.

1. Load Color Images

create a new Python file called ShowImage.py, or whatever you like, copy and paste the following codes, and make sure you have your image file in your PyCharm project (in my case, you can use any IDE) folder and correctly point to it.

1 import cv2

2 img = cv2.imread("../res/flower004.jpg")

3 cv2.imshow("Image", img)

4 cv2.waitKey(0)

5 cv2.destroyAllWindows()

Line 1 import cv2 tells the Python to include the cv2 (OpenCV) library. Every time when using OpenCV, must import the cv2 package. This is typically always the first statement in the code file.

Line 2 cv2.imread() is the function to load an image, the image file path is specified in the argument.

Line 3 cv2.imshow() is the function to show the image. The first argument is the title of the window that displays the image, the second argument is the image that returned from cv2. imread() function.

Line 4 Wait for a keystroke. If do not wait for a keystroke, the cv2.imshow() will display the window and go to the next immediately, the execution will complete and the window will disappear, this happens very quickly so you can hardly see the result. So cv2.waitKey() is typically added here to wait for a user to press a key.

Line 5 Destroys all windows before the execution completes.

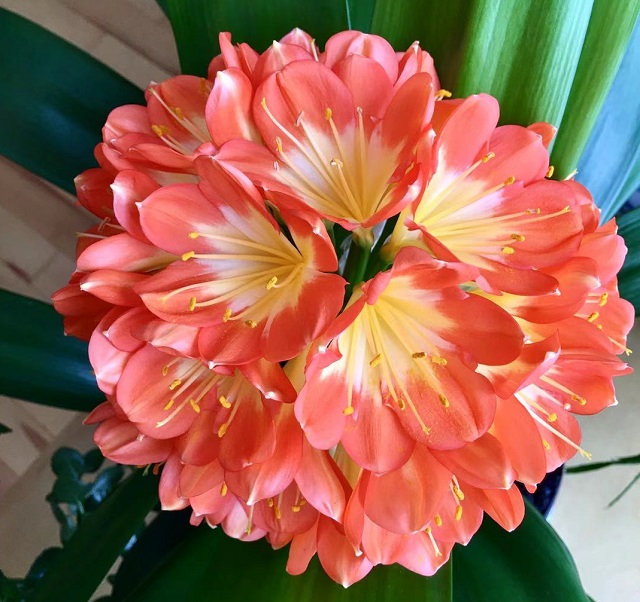
Run the code, the loaded image is displayed, as shown in Figure below-


cv2.imread() is an OpenCV function used to load the image from a file, here is its syntax:

cv2.imread(path, flag)

Parameters

path: The path of the image to be read.

flag: Specifies how to read the image, the default value is cv2.IMREAD_COLOR.

cv2.IMREAD_COLOR: Load a color image. Any transparency of the image will be neglected. It is the default flag. You can also use 1 for this flag.

cv2.IMREAD_GRAYSCALE: Load an image in grayscale mode. You can also use 0 for this flag.

cv2.IMREAD_UNCHANGED: Load an image as such including alpha channel. You can use -1 for this flag.

Return Value 

The image that is loaded from the image file specified in the path parameter.

Now let’s load this image file in grayscale mode and display it. Just simply replace the line 2 in above codes with the following, it tells the cv2.imread() to load image in grayscale mode. img = cv2.imread("../res/flower004.jpg", cv2.IMREAD_GRAYSCALE)

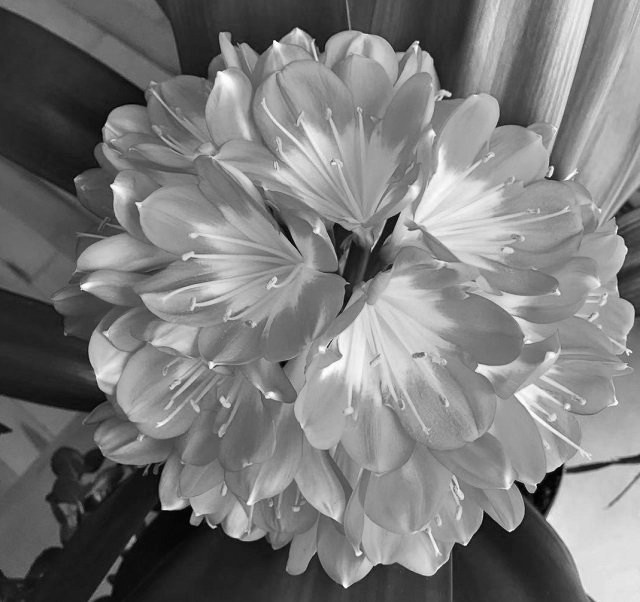
Execute the code and the grayscale image is shown as Figure below-


Share:

Tuesday, August 1, 2023

OpenCV

OpenCV is a popular open-source computer vision library that provides a vast range of tools and algorithms for image and video processing. It is originally written in C++, but has interfaces for various programming languages, including Python, Java and so on, it’s a cross-platform library, although this book will focus only on Python. OpenCV is designed to be fast and efficient, making it an ideal choice for real-time computer vision applications, and it has become a standard tool for many computer vision projects.

OpenCV is used for image and video processing, object detection, as well as machine learning. The library comes with many built-in mathematical algorithms and is fast enough for real-time video processing. Today it’s widely used for resolving the related problems. OpenCV's versatility and powerful set of tools make it a popular choice for a wide range of computer vision applications in various industries, including healthcare, automotive, security, entertainment, and more. It has a wide range of applications in today’s world, which include but not limited to:

  • Object detection and recognition: OpenCV can be used to detect and recognize objects in images and videos, allowing for applications such as security and surveillance systems.
  • Facial recognition: OpenCV has powerful facial recognition capabilities, which can be used in applications such as biometric authentication and identity verification.
  • Optical character recognition (OCR): OpenCV can be used to recognize text in images, making it a useful tool for applications such as document scanning and image-to-text conversion.
  • Video processing: OpenCV can be used for real-time video processing applications, such as video stabilization and object tracking.
  • Medical imaging: OpenCV can be used to process and analyze medical images, allowing for applications such as diagnosis and treatment planning.
  • Robotics: OpenCV can be used in robotics applications for tasks such as object detection and tracking, as well as navigation and mapping.
  • Augmented reality: OpenCV can be used to create augmented reality applications, such as virtual try-on applications for fashion and beauty products.

Python and OpenCV together form a powerful combination for computer vision projects. Python provides an easy-to-learn language that is great for prototyping and experimenting with ideas, while OpenCV provides a comprehensive set of tools for image and video processing. Python's integration with OpenCV makes it easy to write computer vision applications in a high-level language, allowing developers to quickly build and test their ideas.

Python and OpenCV are two essential tools for anyone interested in computer vision. Python's ease-of-use and flexibility, combined with OpenCV's powerful set of tools and algorithms, make it a go-to choice for many computer vision projects.

OpenCV combined with Python can be used to-

  • Read, show and save images.
  • Read and show videos or webcam videos with the specific libraries.
  • User interaction such as keyboard or mouse operations.
  • Draw texts and shapes such as circles, rectangles, triangles, etc.
  • Detection of colors and shapes from images, such as circles, rectangles, triangles, etc.
  • Detection of faces, eyes and human from images or videos.
  • Text recognition in images.
  • Modify image quality or colors, e.g. blur, warp transform, blend, resize, adjust colors, etc.
  • Machine learning methods, including K-Means, K-Nearest Neighbors, Support Vector Machines, Artificial Neural Networks and Convolutional Neural Networks.

The benefits of using OpenCV-

  • Open source and free, easy and simple to learn.
  • Fast for processing, especially used for video processing, for example detect objects from videos.
  • Offers over 2,500 mathematical algorithms, they are efficient enough not only for image but also for video and real-time processing.
  • The algorithms and functions are designed to take advantage of hardware acceleration and multi-core systems.

Share: